Image Management & Editing
We’ve got a few common sizes used throughout the site.
| Image Size Name | Usage | Image Size |
|---|---|---|
| ctnofa-home-hero | Home Page hero background | 1920px by 1080px |
| ctnofa-topper-short | At the top of every page | 1920px by 380px |
| ctnofa-program | On the Program page | 630px by 518px |
| ctnofa-large-square | Used for bios and workshops | 600px by 600px |
| ctnofa-wide | Home Page Blocks | 675px by 270px |
| ctnofa-opengraph | This is strictly for social media | 1200px by 630px |
| ctnofa-blog | The blog posts suggested size | 1080px by 640px |
We’ve supplied the site with a very handy tool called Crop Featured Image. The best way to access this is directly from the Media Library.
Note: There is a known bug where if you’re in the Beaver Builder editor (or any other editor) this tool will not open up.
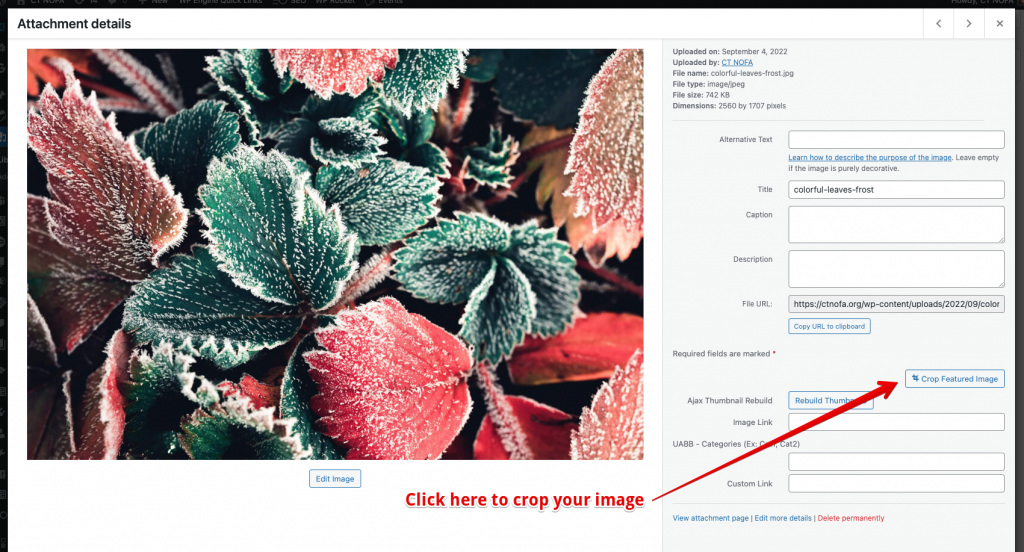
Open up the image you want to edit and then choose the Crop Featured Image button.

Next you’ll see a grid of all of the potential image sizes where you can alter the cropping.
Click on one of those image sizes to then get access to the marque selector in the right panel.
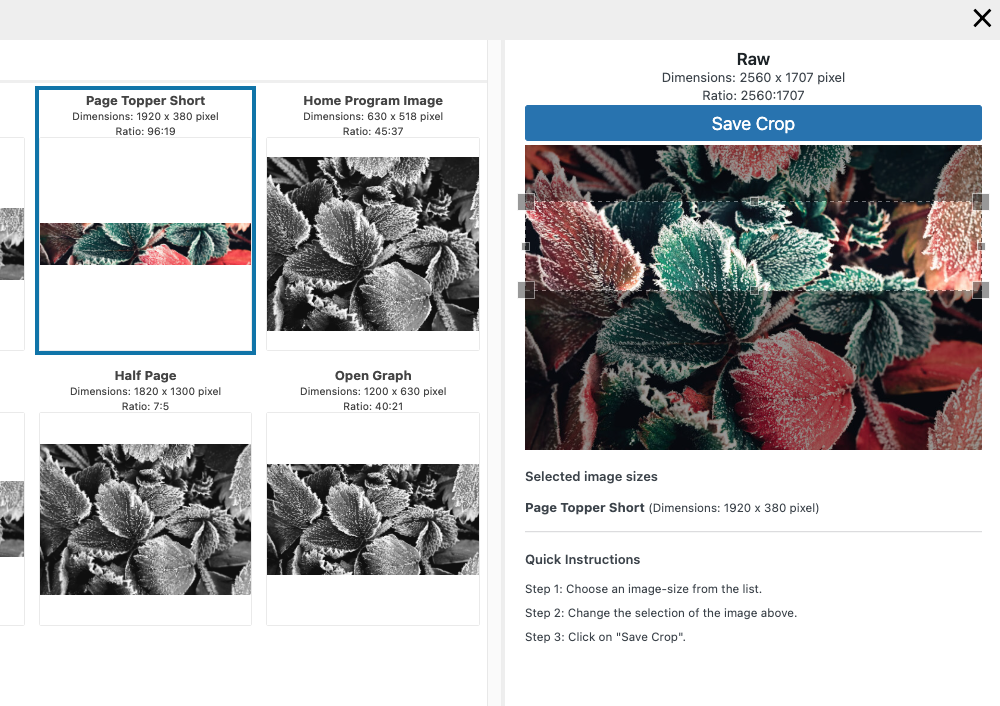
Now you can move that marquee crop up or down, bring it in if you need to. Make sure to click Save Crop. Now your image will be all set to be inserted into the page with the crop as you really want it.
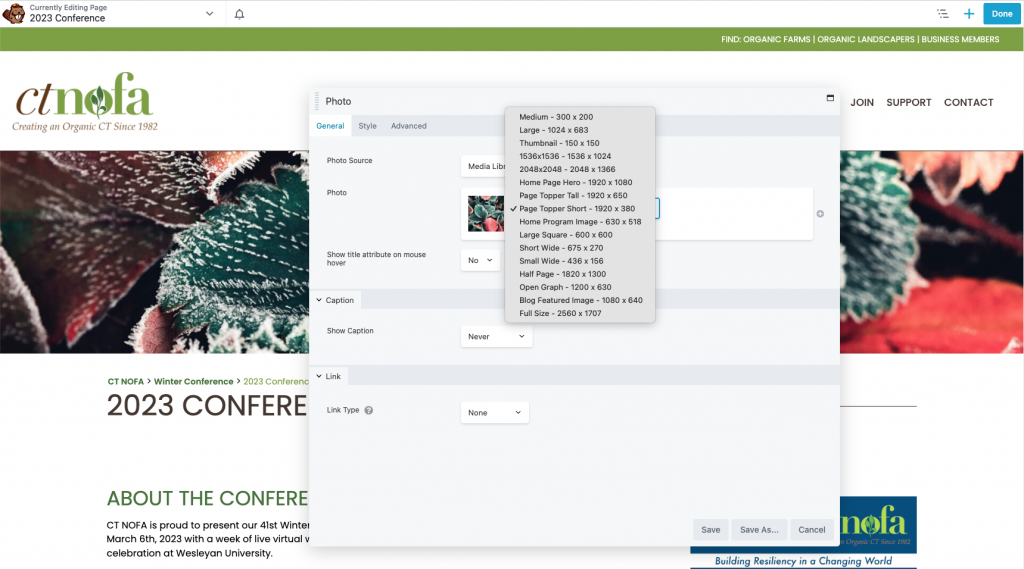
Choosing the Right Size
Whenever possible when adding your image as a piece of content on the page, try to pick the closest size available, ideally, unless the image was pre-cropped in a tool like Photoshop or Canva, do not use Full Size images that are 3000+ pixels wide. This will cause the page to slow down significantly.
When you use the Image Module to add an image you’ll see a list of available sizes for that image. Depending on the size of the image, it may not show all of these and that’s ok.